
Our sponges have a lot more use than they seem !
After reading this article, you will never see them like before.
Use them cleverly, they will allow you to clean almost everything effortlessly, and not just the dishes!
You don't believe me?
Well, check out our 15 Amazing Ways to Use a Sponge .
It will change your life!


Cleaning shuttered windows is a real pain.
It's true that washing each window one by one takes a long time.
So to help you in this tedious task, we give you the trick.
Take your knife and tuck it between the green and yellow side of your sponge to create a space about 10cm long.
Do the same with the 2nd sponge.
Take your salad tongs and insert the sponges on each branch by sliding them through the hole you have created.
Your kitchen tongs now have 2 sponges attached to each end.
All you have to do is wet the sponges and slide them above and below the glass with your pliers.
So, no more hassle when you clean your shutters! It will be done in 2 times 3 moves!

To all the budding dressmakers and seamstresses, this trick will change your life...
...Because it will finally allow you to easily store your pins without losing them.
Simply lay your yellow face sponge on top.
Plant your pins on it.
Your sponge now serves as a pin holder and finally allows you to no longer have them everywhere.

What would you say if I told you that your sponge can foam almost continuously?
No need to add a foaming product like washing-up liquid every 5 minutes!
With your knife, cut the long side of your sponge by 5 cm between the green and yellow side.
In the notch thus created, insert a small soap to the end.
Soak your sponge in water and lather the sponge.
No need to add cleaning fluid!
All you have to do is wet your sponge in water each time you use it and it will foam up on its own.

Watering your flowers is obviously vital.
Except that in case of hot weather, your plants will be weaned quickly. So to help them pass the course, follow this tip.
Place a sponge at the bottom of your flowerpot, yellow side up.
Then cover it with potting soil and then your young plant.
Tamp well and water abundantly.
Your sponge has the power to retain water which allows your plant to stay hydrated for much longer!

You want to do a bonding session with your child and for that you use good old liquid glue.
Except that of course you dirty everything around you so much it drools everywhere.
To avoid this, we give you the solution.
Pour the liquid glue on your sponge on the yellow side and spread with the spoon over the entire surface.
Lay the sponge on a flat surface and tap your images to stick onto the smeared liquid.
No more smudges, no more glue in your fingers!
Your image is ready to adhere to your hyper clean support.

Are your fan guards full of dust?
Are you wasting your time cleaning your utensil rod by rod?
Stop beating yourself up over nothing. We explain how to do it.
Place your sponge horizontally with the yellow side facing you and hold it with the fork.
Cut it into several 1 cm columns with the knife without tearing the green side.
Turn the sponge and repeat the process to cut in a column.
The yellow side of your sponge is now divided into small squares.
Its new shape will easily clean about ten fan protection rods at a time.
No more wasting time!

To close a mail envelope, we all do the same thing.
We stick our little tongue on the part to fold and we close our eyes feeling the bitter taste of the glue.
Well now you won't have to do that.
Dampen your sponge with water.
Squeeze the sponge between your hands to wring it out as much as possible.
Pass the moistened sponge over the part of the envelope to be glued.
No need to languidly kiss your envelope! The sponge takes care of everything.
Now you know how to paste your mail easily.
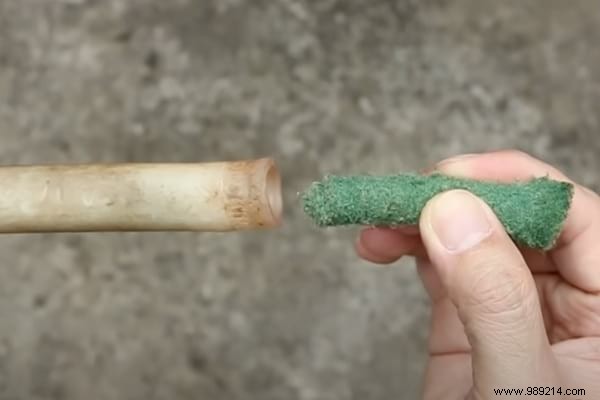
Is your garden hose showing signs of fatigue?
Flows of slightly dirty water appear? It is probably obstructed by small vegetation or other detritus.
Before you go to the store to buy another one, do this instead.
Take an old double-sided sponge and separate the yellow side from the abrasive green side.
Roll up the abrasive green part on itself and put it in the pipe.
Connect the hose to your water outlet on the side where the sponge was rolled. Open the tap and let the water run until you see the sponge come out.
With the pressure of the water, your sponge will have traveled the entire pipe, carrying all the impurities.
You will see them come out little by little and your pipe will finally be clean from the inside.
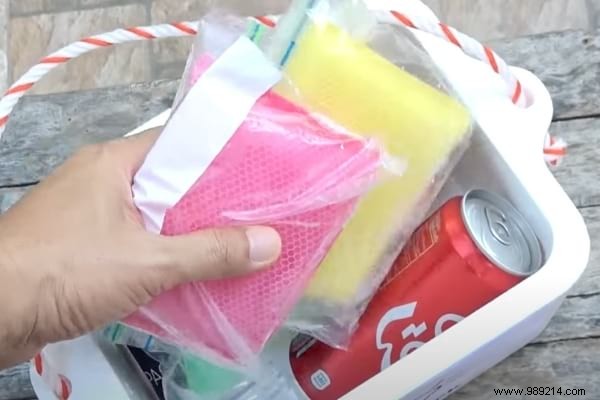
The main utensil to put in the cooler to keep your food cold is obviously the ice pack.
But what if you don't have one and you realize it the day before the picnic? Nothing could be simpler, follow the guide.
Immerse your sponge in a bowl of water. Take it out without wringing it.
Place the wet sponge in the food bag, close the bag and put it in your freezer.
Let your composition freeze and take out the sachets.
You have created blocks of ice ready to be installed in your cooler.
It's super simple and super economical.
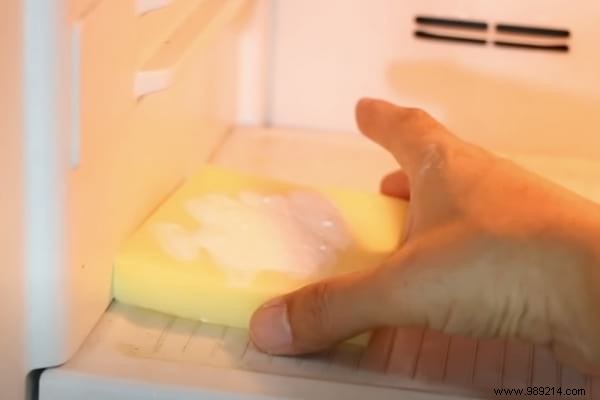
Stinky cheese smells haunting your fridge?
A grandmother's recipe will help you get rid of them.
Sprinkle one side of the sponge with baking soda.
Place your baking soda-covered sponge in the top compartment of your fridge.
The properties of baking soda allow it to absorb all bad odors.
No more stinky fridge! You have cleansed it naturally.
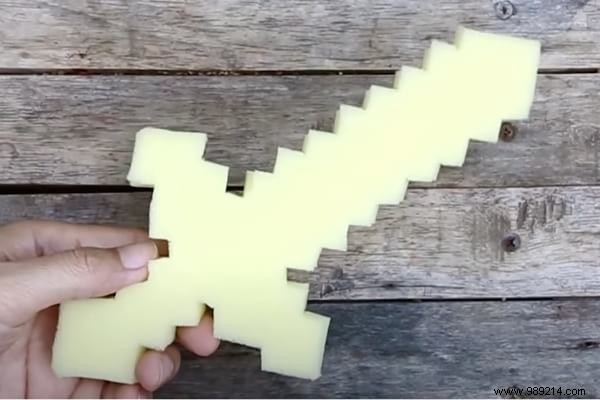
If you have a large sponge, you can make a small toy your kids will love.
Draw with a marker, a sword or any other cool shape on the large sponge.
Use scissors to cut out the shape you drew on the sponge.
Color the sword with paint.
And there you have it, you have made a toy that your children will have fun with.

Removing the varnish from your nails is always a delicate operation.
You need a lot of utensils to achieve a satisfactory result and it is often long and tedious.
So, to make your life easier, we give you a grandmother's tip.
Roll up your sponge on itself and put it in the glass bottle.
Take your nail polish remover and pour it into the bottle to impregnate the sponge.
Insert your finger into the bottle, making sure to rub your nail with the sponge by going back and forth.
Repeat with each finger.
You have easily removed the old polish from your nails.
Your homemade manicure is done in a few moments!
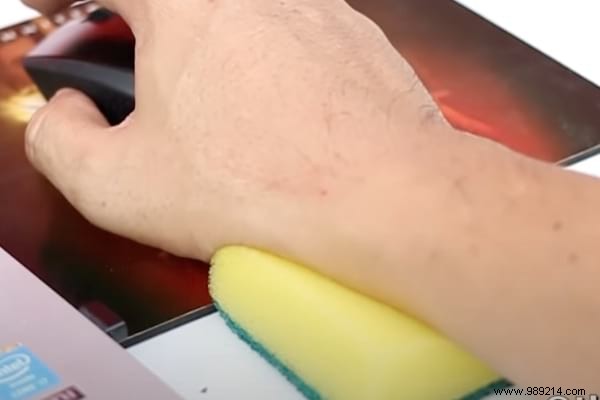
Your wrist is starting to get tired because you're not comfortable using your mouse.
You are missing a wrist rest to have a more ergonomic workstation.
We will give you the solution.
Simply position the sponge horizontally in front of your mouse pad, yellow side up.
You have created in an instant a wrist rest that will change your daily life.
No more numb arm.
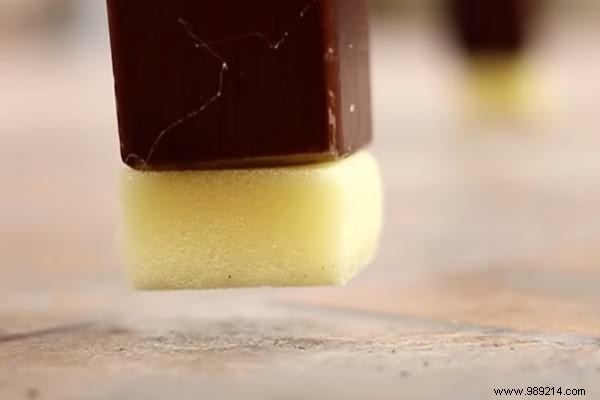
Who has never found themselves with traces on the ground because of the friction of their chairs?
It's true that we tend to drag our chairs when we go backwards or forwards, which often causes marks.
We have the solution to avoid this!
Take your sponge and cut a part of it with scissors...
...To obtain 4 squares the size of a chair leg.
Add glue to the ends of your chair legs and place the cut foam squares there.
Your floors are now protected thanks to the sponge squares at the end of the chairs.
You can now move backwards or forwards by dragging your seats without fear of marks on the ground.

Did you know that you can germinate seeds in a sponge?!
What an unusual idea you might say! And yet we assure you that it works.
Take your cutter and slice your sponge to create 5 lines of the same size.
Place all of your seeds in the lines created.
Spray the entire surface of the sponge with water.
With regular watering, your seeds will begin to germinate!
You have created a support for a mini vegetable garden.